
Welcome to our first Do It Yourself blog post. Our topic this week is Candy tables. Candy tables are a great way to add a little fun to your event! All your guests, both young and old, can appreciate a sweet treat. Our 5 easy steps to create the perfect candy table will help take the stress out of this fun DIY.
So here we go…
Step 1: Decide on your colour and theme.
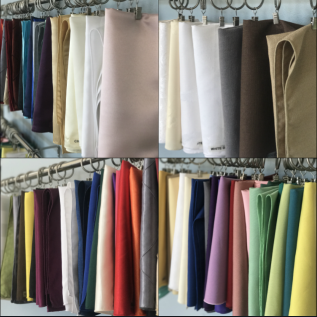
Think about the theme of your party. Is it a wedding, baby shower, wedding shower, or birthday? Candy is colourful so don’t be afraid to have some fun with colours and patterns. In our opinion the brighter the linen, the better.
Step 2: Pick your candy.
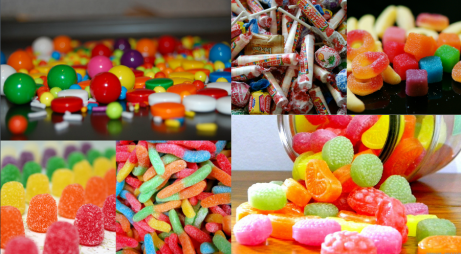
There are three main types of candy to choose from; bulk/loose candy, packaged candy, and designer candy. Bulk candy can be found in stores like the Bulk Barn. Packaged candy can be found in specialty candy stores in many varieties. Designer candies can be made at many locations in Toronto. If you are looking for something really cool, head on over to www.mymms.com where you can get your face printed on M&M’s candy.
Step 3: Pick your Container.
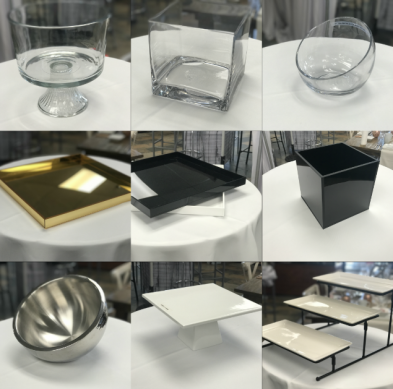
Now that you have your candy, you can pick your container. Packaged candies can be laid out on flat surfaces to display the type, while bulk candies can be put in glass containers to show off the vibrant colours. We rent the above containers at www.gervaisrentals.com .
Step 4: How much candy do you need?
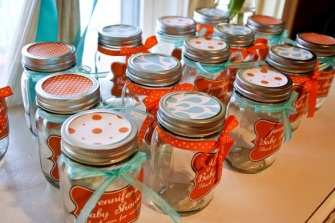
When planning for your event, make sure you have enough candy. Try buying about 6-10 oz. per guest. Mason jars and mini paper bags can be used by your guests to carry their candy. If you choose paper bags, check out Michaels craft store for ink stamps to make your bags uniquely yours.
Step 5: Give your table a Pop
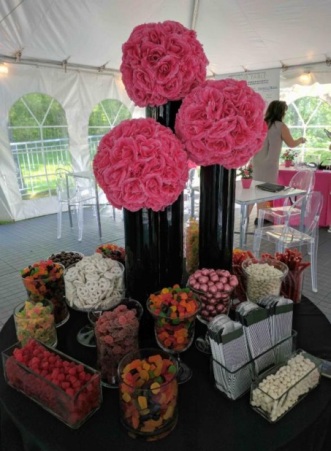
Your candy is already going to be the star of the show but don’t forget to give the table a little love too. Try adding cute little signs or tall centerpieces. It will help make the table more visually pleasing.
